 by
by Hair trimmers are an essential tool for anyone who prefers to maintain their hairstyle at home or those who regularly groom their hair. These devices are versatile, convenient, and can save a significant amount of money compared to visiting a salon. However, like any mechanical device, hair trimmers are susceptible to wear and tear. With proper maintenance and timely repairs, you can prolong the life of your hair trimmer and ensure that it remains in top condition. This guide dives deep into the nuances of hair trimmer repair and maintenance, equipping you with the knowledge to keep your trimmer functioning effectively for years to come.
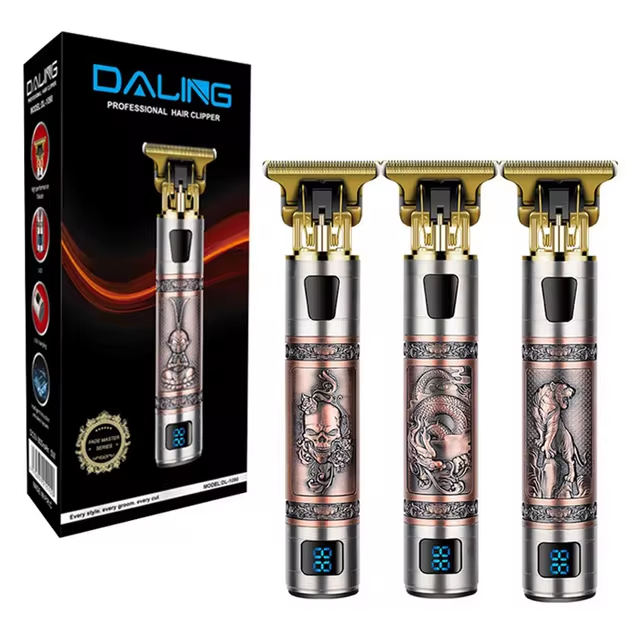
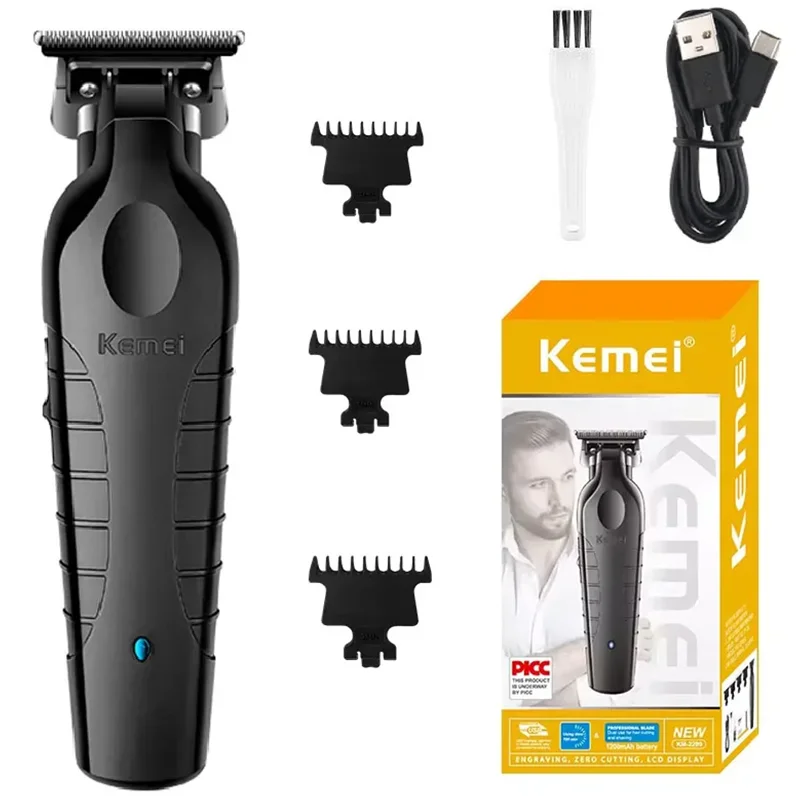
Understanding the Anatomy of Hair Trimmers
The Main Components
To troubleshoot and repair a hair trimmer, it is essential to understand its basic components. The primary parts include:
- Blades: The cutting mechanism that trims hair.
- Motor: The engine that powers the blades.
- Battery: In cordless models, the rechargeable battery powers the motor.
- Housing: The outer shell that encases the internal components.
- Power Cord: For corded models, the power supply connection.
- Safety Guards: Attachments that assist in achieving different hair lengths.
Different Types of Hair Trimmers
Hair trimmers come in various models and types, including:
- Corded Hair Trimmers: These models provide consistent power but require an outlet for usage.
- Cordless Hair Trimmers: These rely on rechargeable batteries which offer convenience and mobility.
- Professional Hair Trimmers: Often more robust and designed for frequent use in salons.
- Personal Hair Trimmers: More compact and less powerful, designed for at-home usage.
Each type has its unique maintenance challenges and repair methods.
Common Issues with Hair Trimmers
Every device can encounter issues, and hair trimmers are no exception. Here’s a look at some common problems:
1. Blades are Dull or Clogged
One of the most frequent issues with hair trimmers is dull or clogged blades. This situation can lead to uneven cuts and much frustration during grooming.
Symptoms:
- Hair gets pulled instead of cut.
- The trimmer makes unusual sounds.
- Uneven results during a haircut.
2. Battery Isn’t Holding a Charge
For cordless models, battery life is crucial. If your trimmer doesn’t hold a charge, it can be a major inconvenience.
Symptoms:
- Quick discharge after a full charge.
- The device turns off unexpectedly during use.
3. Motor Malfunction
If the motor fails, your hair trimmer may produce minimal or no movement from the blades.
Symptoms:
- Noisy operation or grinding sounds.
- Blades move slower than normal or not at all.
4. Mechanical Damage
Dropping or mishandling a hair trimmer can cause internal damage that may not be visible externally.
Symptoms:
- Components may become loose.
- The housing might crack or break.
5. Poor Performance or Overheating
A trimmer may overheat during extended use, leading to performance dips.
Symptoms:
- Body feels hot to the touch.
- Sudden stops after a short operation period.

Preparing Your Tools for Cleaning
Before diving into the cleaning process, gather the necessary tools. This ensures a thorough, efficient cleaning session. Here’s what you’ll need:
- Small brush (often provided with the trimmer)
- Soft cloth or microfiber towel
- Lubricating oil
- Warm water
- Mild soap or detergent
- Small screwdriver (if needed for disassembly)
- Alcohol-based disinfectant
Having these tools at hand will streamline the process, allowing you to focus on each cleaning step without interruption.
Steps to Clean Your Hair Trimmer
Now that you are prepared with the necessary tools, let’s dive into the step-by-step cleaning process. Following this guide will help you maintain your hair trimmer’s optimal performance and hygiene.
Removing and Cleaning the Blades
The first and most crucial step in cleaning your hair trimmer is dealing with the blades. Here’s how to do it:
- Unplug the Trimmer: If it’s a corded trimmer, unplug it. For cordless trimmers, ensure it’s switched off.
- Remove the Blade Guard: If your trimmer has a blade guard, remove it gently to access the blades.
- Detach the Blades: Using a small screwdriver if necessary, unscrew or snap off the blades carefully. Always refer to the user manual if unsure.
- Brush Away Debris: Use a small brush to remove hair, dust, and debris from the blades. Take care to reach between the teeth for a thorough job.
- Wash the Blades: In a bowl with warm water and a few drops of mild soap, gently clean the blades, removing any stubborn residue. Avoid immersing electronic parts.
- Rinse and Dry: Rinse the blades under warm water, ensuring all soap is removed. Pat them dry with a soft cloth, leaving no moisture that could lead to rust.
Cleaning the Trimmer Body
With the blades taken care of, the next focus is the trimmer body.
- Brush Off Loose Hair: Use a brush to remove any hair clippings from the trimmer’s body, including around the motor area.
- Wipe with a Damp Cloth: Moisten a cloth with warm water and gently wipe down the exterior. Avoid soaking the cloth to prevent water from entering the device.
- Sanitize with Alcohol: Use an alcohol-based disinfectant to clean areas that come into direct contact with skin. This helps kill any lingering bacteria.
Caring for the Battery
For cordless hair trimmers, maintaining the battery is vital. Follow these steps to keep it in good condition:
- Clean Battery Contacts: Use a dry cloth to wipe the battery contacts. Avoid any liquids that could cause corrosion.
- Full Charge and Discharge: Periodically allow the battery to fully discharge and then recharge. This can help maintain its longevity.
- Store Properly: When not in use, store the trimmer in a cool, dry place to avoid unnecessary battery drain.
Using Lubricating Oil
After cleaning, the next important step is to lubricate the blades to reduce friction and prevent wear and tear.
How to Apply Lubricating Oil
- Apply Drop of Oil: Place a single drop of lubricating oil on the blade teeth.
- Distribute Evenly: Turn on the trimmer briefly to allow the oil to distribute evenly among the blades.
- Wipe Excess Oil: Use a clean cloth to wipe away any excess oil, preventing any slippery residue.
Lubricating your hair trimmer after each cleaning session helps maintain blade sharpness and ensures smooth operation.
Regular Maintenance Tips
To keep your hair trimmer in excellent condition, regular maintenance is key. Here are some tips to follow:
Routine Cleaning
Get into the habit of cleaning your hair trimmer after every few uses. This helps prevent buildup and keeps your tool efficient.
Storage Solutions
Store your hair trimmer in a protective case or bag to keep it safe from dust and potential damage.
Periodic Blade Replacement
Over time, blades can dull. Regular replacement ensures consistent cutting performance and prevents skin irritation.
Troubleshooting Your Hair Trimmer
Despite regular maintenance, problems may still arise. Here are troubleshooting steps for common issues:
Dealing with Dull Blades
If you notice your blades are not cutting effectively, it may be time to sharpen or replace them.
Sharpening:
Some trimmer models have the option to sharpen blades. Use a specialized sharpening stone or consult a professional if unsure.
Replacement:
Replacement blades can often be purchased from the manufacturer or third-party suppliers. Make sure to choose compatible blades.
Resolving Battery Issues
If your cordless hair trimmer isn’t holding a charge, the battery may be at fault:
Check Connections:
Inspect any wiring or connection points for damage or corrosion.
Replace the Battery:
If the battery continues to fail, consider replacing it. Always choose a battery that is specifically compatible with your trimmer model.
Motor Functions
If you suspect that the motor is malfunctioning:
Listen for Sounds:
Unusual noises could indicate motor wear. Open the housing to check for any visible signs of damage.
Seek Professional Help:
If you’re unable to identify the problem, it may be best to consult a repair technician, especially for intricate motor issues.
 When to Seek Professional Help
Sometimes, despite your best efforts, you may find that your hair trimmer is still not functioning as it should. In such cases, seeking professional help may be necessary.
Signs You Need a Repair Professional
- Persistent issues after you’ve attempted basic troubleshooting.
- Visible damage or wear that you cannot address with DIY fixes.
- Electrical issues such as exposed wiring or constant tripping of electrical outlets.
Choosing a Repair Service
When seeking professional repair, consider the following:
- Reputation: Look for reviews and testimonials from previous customers.
- Certification: Prefer certified technicians who understand your specific trimmer model.
- Warranty: Inquire about warranties on repairs to ensure confidence in the service provided.
Conclusion
Maintaining and repairing your hair trimmer doesn’t have to be a daunting task. By following the guidelines provided in this comprehensive guide, you can ensure that your trimmer remains in optimal condition for many years. Regular cleaning, proper storage, and attentive troubleshooting can effectively prevent common problems. However, understanding when to seek professional assistance is equally crucial for your device’s longevity. The joy of grooming at home with a trusty hair trimmer can be immensely satisfying, and with the right maintenance, you can enjoy that experience for a long time to come. Whether you’re a DIY enthusiast or someone who prefers to leave repairs to professionals, knowledge is your best ally in keeping your hair trimmer effective and reliable.